1

(86 respuestas, enviadas el English talk)

Back from the dead again, sorry... I had tried some things with your image, but I did not really get what you were meaning with the texture:
https://www.mediafire.com/convkey/3678/krl4rjk7coj3jy96g.jpg

Now, thanks to your link, I think I can see it. Replicating such noise should be possible. Here is a quick try with noise added to the CMYK channels of the previous image:
https://www.mediafire.com/convkey/28d3/ph3mycq6ee5e3om6g.jpg

Is the difference between the two images a step in the right direction?

2

(86 respuestas, enviadas el English talk)

Your Kizuna Encounter photo is indeed nice. A pity that this process is so time-consuming.

I could try to play a bit with the shader settings for the big screenshots, if you like. (The BVM might not be the style of monitor you would like to simulate, though. Rather a Trinitron, maybe? And I assume you still want curvature.)

However, I doubt I could manage to do anything for the small screenshots, seeing how I failed miserably in the past...

As for fonts, I also used to hate subpixel rendering, but I do not mind it anymore on screens with a high enough pixel density. You must have a keener eye than me...

By the way, if you have time, I have one question that might not be pertinent to Postback but that is nevertheless bothering me: what is the best way to simulate a screenshot from a game that runs natively in 480i? Are we supposed to combine two consecutive fields? That would look terrible...

3

(86 respuestas, enviadas el English talk)

Hello, Recap.

Yes, the Buster sample comes from a RetroArch screenshot. I just used the shader CRT-Royale with some popular settings aiming to simulate a PVM monitor. It is possible to increase the resolution, of course, although you would probably need to try (and maybe combine) different shaders and tweak their settings yourself to be satisfied:

http://i1179.photobucket.com/albums/x395/p0mpile/Postback/buster_sample_zpsueplxazm.png

I was letting you know about this stuff precisely because of the new Postback. But it will not be coming very soon if you are waiting for 4K monitors to become mainstream, I guess. =]

4

(86 respuestas, enviadas el English talk)

No real progress on my side after all that time. I am quite happy with my script for doubled screenshots, but not so much with the one for quadrupled screenshots, since it does not really allow simulating a round spot.

However, I have seen that you can load PNG pictures in RetroArch, thus automatically upscaling them and applying a shader, and then take screenshots. You may find it useful with all the CRT shaders with tweakable settings there are out there.

http://i1179.photobucket.com/albums/x395/p0mpile/Postback/buster_detail_zpsr7q1t1dh.png
http://i1179.photobucket.com/albums/x39 … 8g37pu.png

5

(86 respuestas, enviadas el English talk)

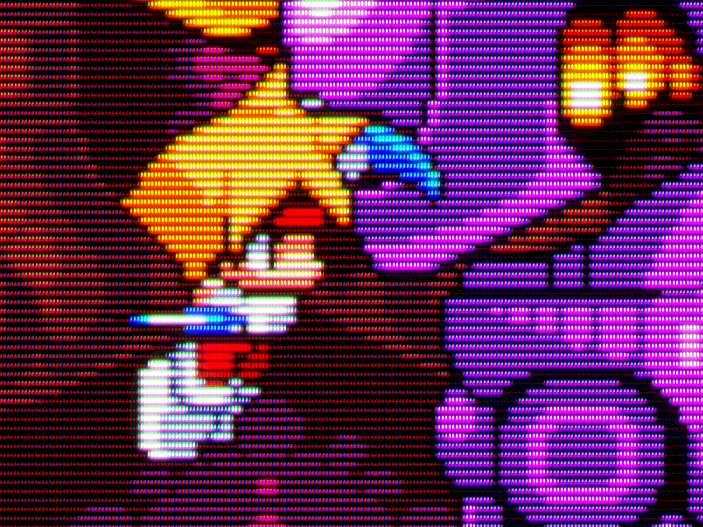
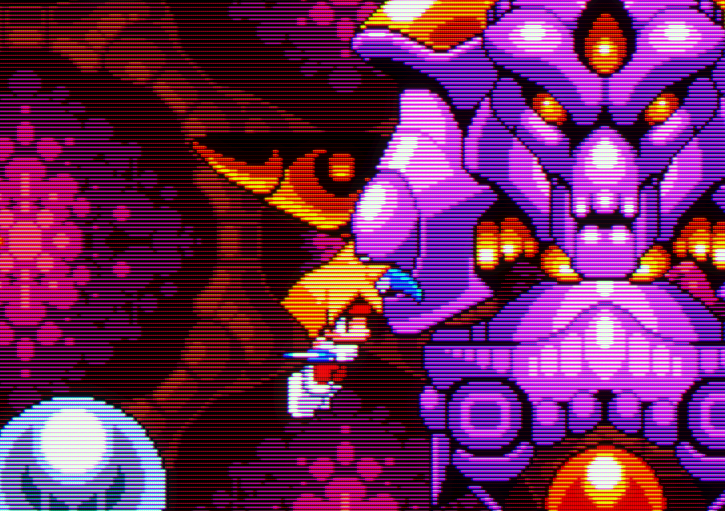
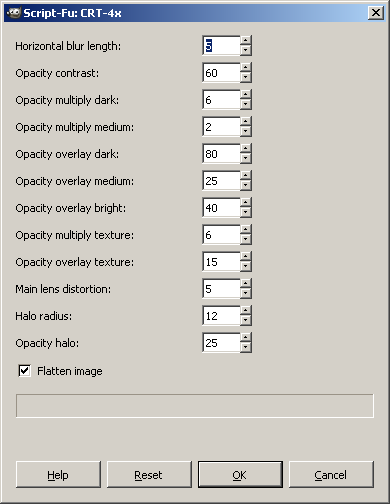
And a new version with a basic halation effect. There are therefore more parameters now. If you find better ones than the default, let me know.

http://www.mediafire.com/download.php?zeqs640acgwadsd

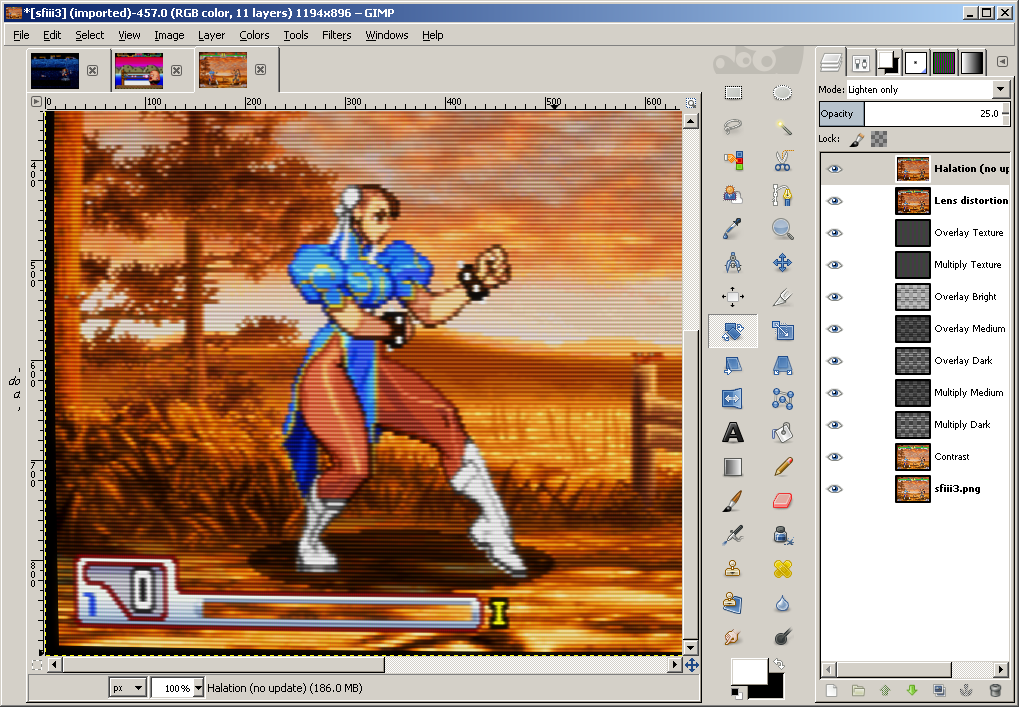
As a  reminder: if you have unchecked "Flatten image", you can then play with the layers' opacity. But the possible layers for distortion and halation must be made invisible or deleted in order to see any effect of the layers below.

http://i1179.photobucket.com/albums/x395/p0mpile/Postback/Panel.png

http://i1179.photobucket.com/albums/x395/p0mpile/Postback/CRT-4x-v04.png

6

(86 respuestas, enviadas el English talk)

My script was running very slowly, so I modified the code. The new version 0.3 should be much faster.

http://www.mediafire.com/?ob4cvs1ftckny4v

7

(86 respuestas, enviadas el English talk)

Here is an extended version of the script, with a slightly modified scanline effect and options for contrast modification and subpixel texturing. If you do not flatten the image, you have a lot of parameters which you can play with by changing the opacity of the various layers.
http://www.mediafire.com/download.php?0nr5rp75cxnvsq5

http://i1179.photobucket.com/albums/x395/p0mpile/CRT-4xv02.png

8

(86 respuestas, enviadas el English talk)

You are welcome. I have found quite a lot of things to add to the script, so I will work on it and provide an update when I am finished. I hope it will be useful to someone. By the way, are you still working on new articles or on the site redesign?

9

(86 respuestas, enviadas el English talk)

I am finally playing again with screenshots, using GIMP and a PC this time. And I have noticed that the method for quadrupled screenshots I had explained earlier is not working properly on this new setup. (Even the upscaling is not right...) Also, the method is a bit bothersome to use.

So I somehow managed to write a script for the GIMP that can do everything automatically, but still lets the user plays with the parameters if he wants to. GIMP is a free, powerful and cross-platform software, so it should now be easy for anybody to get the expected results. In order to use this script, you should:

- Install GIMP (link), of course

- Download my script (link), and copy it to the script folder: C:\Documents and Settings\YourUserName\.gimp-2.8\scripts

- Launch GIMP (or, if you had already done it before copying my script, refresh the scripts: Filters/Script-Fu/Refresh Scripts)

- Open your screenshot (and correct the image if necessary)

- Launch the script: Filters/CRT/Quadruple screenshot
http://i1179.photobucket.com/albums/x395/p0mpile/Postback/a.png

- In the window that pops up, you may change some parameters: amount of horizontal blur, opacity of the four layers creating the scanline effect, optional distortion. (If you want to be able to play by yourself with the layers creating the scanline effect, you should uncheck the box "Flatten image", and leave 0 for the distortion.) Then press OK and wait for a few seconds.
http://i1179.photobucket.com/albums/x395/p0mpile/Postback/b.png

- You got your image. If you have unchecked the box "Flatten image", then you can adjust the opacity of the four layers creating the scanline effect in order to suit your taste.
http://i1179.photobucket.com/albums/x395/p0mpile/Postback/c.png


I will try to improve this script in the future, and am of course open to questions and suggestions.

10

(1 respuestas, enviadas el English talk)

If you like mechanical keyboards, you may be particularly interested about this project to manufacture buttons with Cherry keyswitches. In fact, the funding campain has already attained its goal, but it is still possible to contribute by preordering for a couple of days.

http://www.indiegogo.com/HBFS30

11

(4 respuestas, enviadas el English talk)

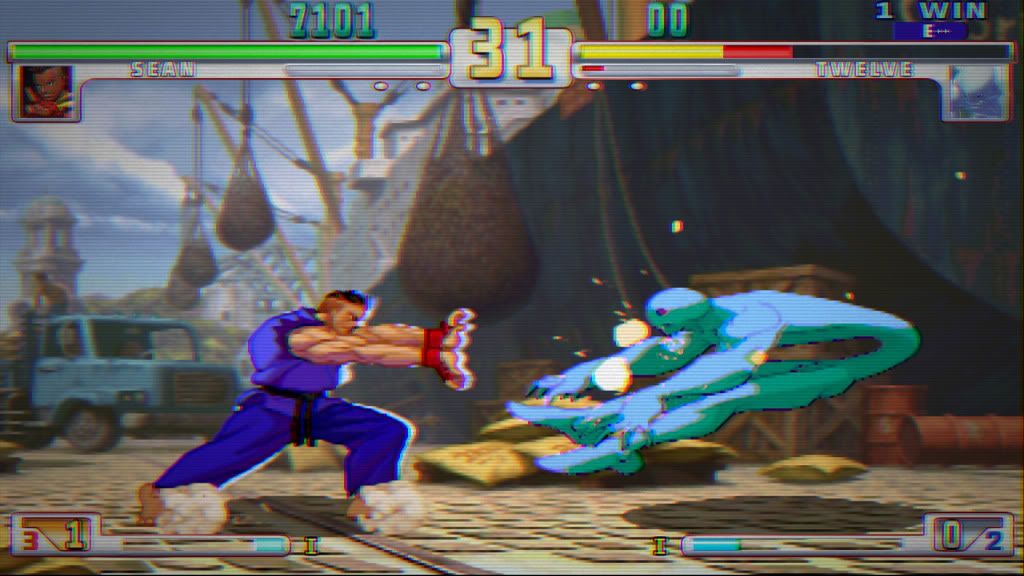
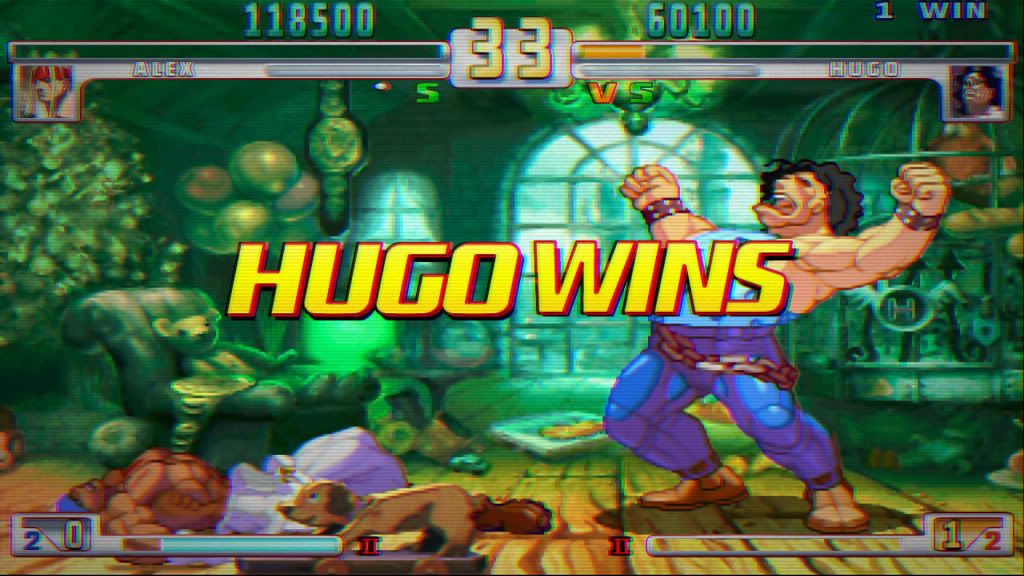
Hi! I have not posted for a while because I have not made any real progress on the screenshots yet, but I could not resist to show the filter proposed in SF3.3 Online Edition.

http://i1179.photobucket.com/albums/x395/p0mpile/Postback/16x9_with_Scanlines_1.jpg

http://i1179.photobucket.com/albums/x395/p0mpile/Postback/16x9_with_Scanlines_2.jpg

12

(86 respuestas, enviadas el English talk)

As far as I understand the subject, the bilinear interpolation should be equivalent no matter what software you use...

I am not sure about what is wrong in your picture. In fact, I still have some issues with PNGs and I am not sure that I see your image on my computer as intended.

Anyway, the "scanline effect" created by the layer in Overlay mode seems a bit overdone... If that is the problem, you could try to decrease the opacity of this layer...

13

(86 respuestas, enviadas el English talk)

Well, it is just that your screenshot looked strange, so I wondered what could have gone wrong. Since the PNG I linked has some transparency, I thought that maybe your software didn't take this into account. I checked, and that seems to be the case, for whatever reason...

Anyway, I have just made two new PNGs, without any transparency, that should do the job. Use the same procedure as exposed above, but copy the first PNG below in the layer in Overlay mode, and the second in the layer in Multiply mode:
http://img687.imageshack.us/img687/6259 … aoverl.png
http://img208.imageshack.us/img208/3949 … amulti.png

You should get something like this:
http://img217.imageshack.us/img217/9649/test2a.png

14

(86 respuestas, enviadas el English talk)

Strange. The PNG for the scanline effect has an alpha layer (i.e. transparency), but it seems that you don't use it... Can you check this? If you don't manage to do it, I will create two PNGs without alpha layer. That should work fine.

Could you send the original screenshot?

15

(86 respuestas, enviadas el English talk)

Oh, right, I used linear. Bilinear basically means linear in two dimensions.

16

(86 respuestas, enviadas el English talk)

I had actually nearly forgotten about these doubled screenshots. When you write that they have the usual issues, do you mean the general issues of any doubled screenshot, or the specific issues of the examples I provided you a while ago? Because the above examples shouldn't have the same PNG-related colorimetric problems. In fact, doubled and quadrupled screenshots now feature nearly identical colors. So if you still don't like these doubled screenshots, the only reason I can see is the vertical interpolation... Here is a doubled screenshot made without vertical interpolation, if you want to compare. Of course, the beam spot doesn't appear round anymore and is not symetrically depicted:
http://img197.imageshack.us/img197/9963 … terpol.png


As for the quadrupled screenshots, the scanlines may be too dark. But it is very easy to adjust (opacity value in step 5). Do you think the screenshots should be a bit more blurry?

I think non-scaled screenshots should only be corrected by increasing the contrast (possibly using the curves tool for more faithfulness). Slightly upscaled screenshots would not look very sharp, except if you don't use any vertical interpolation, but then you would get ugly artifacts because of the few vertically-doubled pixels. Any screenshot should of course be adjusted to a 4:3 aspect ratio with horizontal interpolation. I guess you already know very well about this, but I will be glad to try to help you if I can. So just let me know when you need such screenshots.
No need to talk about them here and now, but here are already three examples: non-scaled, slightly upscaled using vertical interpolation, and slightly upscaled without interpolation:
http://img195.imageshack.us/i/1xtfiv.png/
http://img191.imageshack.us/i/12xtfivinterpol.png/
http://img534.imageshack.us/i/12xtfivjaggy.png/

17

(86 respuestas, enviadas el English talk)

Here are the methods I developed for doubled and quadrupled screenshots. I have a Mac and use Seashore (a simpler version of Gimp) for image editing, and Pixen to save the images as PNGs (because the PNGs saved with Seashore may suffer from colorimetric issues on other computers). Any feedback on the images, the methods or my explanations is of course welcome.

Doubled screenshots

http://img130.imageshack.us/img130/2245/2xtfiv.png
Other examples here:
http://img59.imageshack.us/g/2xms.png/

General procedure

1° - Using linear/bilinear interpolation, double the vertical resolution and adjust the horizontal resolution to get an aspect ratio of 4:3.
2° - Add a bit of horizontal blur.
3° - Increase the contrast: +0.25. (In Seashore, this has about the same effect as duplicating the base layer in Overlay mode with an opacity of 60%.)
4° - Add a scanline effect by copying the PNG below in a new layer in Overlay mode. The PNG has an alpha channel. If you use another application than Seashore, you might have to shift this new layer one pixel up.
http://img638.imageshack.us/i/2xnewezlesswhite.png/
5° - Strengthen the scanlines using the same PNG in a new layer in Multiply mode, with about 20% opacity.


Step-by-step procedure with Seashore:

1° Double the screenshot
- Open your picture with Seashore.
- Image/Scale..., uncheck "Keep proportions", write 200% for the vertical resolution, and then write in the field "Width" the number of pixels needed to get a 4:3 aspect ratio, press Tab, choose "Linear interpolation" and press Enter.

2° Enhance horizontal blur
- You need the "Layers" window to be open. If it's not: Window/Utility Windows/Show Layers.
- Duplicate the base layer (the only one at this point) by pressing the second button at the bottom of the Layers window, and choose 50% for the opacity.
- Shift the new layer one pixel to the right by pressing once the right arrow on your keyboard.
(In order to see the whole picture, in the Layers window, "Show all" must be checked)
- Flatten everything to get a single layer: Image/Flatten Image

3° Increase contrast
- Selection/Effects/Colours/Brightness and Contrast, choose +0.25 for the contrast

4° Apply scanline effect
- Create a new layer by pressing the first button at the bottom of the Layers window.
- Open the PNG file below with Seashore:
http://img638.imageshack.us/i/2xnewezlesswhite.png/
- Copy, close and paste: Cmd+A, Cmd+C, Cmd+W, Cmd+V, Cmd+F
- In the Layers window, choose Modes/Overlay.

5° Strengthen the scanlines
- Duplicate the new layer by pressing the second button at the bottom of the Layers window.
- In the Layers window, choose Modes/Multiply, then choose an opacity of 20%.

The image is first saved as TIFF with Seashore, and then as PNG with Pixen, to avoid possible colorimetric problems.
Here are some other scanline PNGs if you want to make some tests:
http://img138.imageshack.us/i/2xnewezalpha.png/
http://img138.imageshack.us/i/2xnewezdark.png/


Quadrupled screenshots

http://img708.imageshack.us/img708/6746/4xtfivcrop.png
Other examples (full size) here:
http://img692.imageshack.us/g/4xsfiii.png/


General procedure

1° - Without interpolation, double the vertical resolution only.
2° - Using linear/bilinear interpolation, double the vertical resolution again and adjust the horizontal resolution to get an aspect ratio of 4:3.
3° - Increase the contrast (+0.25). (In Seashore, this has about the same effect as duplicating the base layer in Overlay mode with an opacity of 60%.)
4° - Add a scanline effect by copying the PNG below in a new layer in Overlay mode. The PNG has an alpha channel. If you use another application than Seashore, you might have to shift this new layer two pixels up.
http://img19.imageshack.us/i/4xnewezter.png/
5° - Strengthen the scanlines using the same PNG in a new layer in Multiply mode, with about 20% opacity.


Step-by-step procedure with Seashore:

1° Double the vertical resolution
- Open your picture with Seashore.
- Image/Scale..., uncheck "Keep proportions", write 200% for the vertical resolution, press Tab, choose "No interpolation" and press Enter.

2° Final upscaling
- Image/Scale..., uncheck "Keep proportions", write 200% for the vertical resolution, and then write in the field "Width" the number of pixels needed to get a 4:3 aspect ratio, press Tab, choose "Linear interpolation" and press Enter.

3° Increase contrast
- Selection/Effects/Colours/Brightness and Contrast, choose +0.25 for the contrast.

4° Apply scanline effect
- Create a new layer by pressing the first button at the bottom of the Layers window.
- Open the PNG file below with Seashore:
http://img19.imageshack.us/i/4xnewezter.png/
- Copy, close and paste: Cmd+A, Cmd+C, Cmd+W, Cmd+V, Cmd+F
- In the Layers window, choose Modes/Overlay.

5° Strengthen the scanlines
- Duplicate the new layer by pressing the second button at the bottom of the Layers window.
- In the Layers window, choose Modes/Multiply, then choose an opacity of 20%.

The image is first saved as TIFF with Seashore, and then as PNG with Pixen, to avoid possible colorimetric problems.

Here are some other scanline PNGs if you want to make some tests:
http://img19.imageshack.us/i/4xnewezqua.png/
http://img19.imageshack.us/i/4xnewezbis33.png/
http://img109.imageshack.us/i/4xnewezbis50.png/
http://img715.imageshack.us/i/4xkozh.png/


Remarks:

The advantage to use the overlay mode is that you can not only get a round spot, but also make the diameter of spot increase with spot intensity (and independently for the red, green and blue components). This effect is of course less visible on the doubled screenshots.

The blur should be mostly horizontal. That is why I always use horizontal linear interpolation when upscaling the screenshot. I also use some vertical interpolation (for reasons of symetry of the scanline effect), but the interpolated pixels are eventually darkened, so that the image is kept sharp.

The PNGs used for the scanline effect have an alpha channel. That was necessary in order to use the same PNGs both to apply the scanline effect and then strengthen the scanlines.